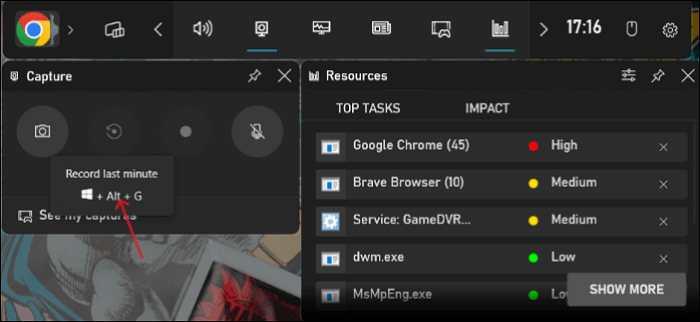
Editing videos efficiently is an essential skill in today’s digital age, whether you’re a content creator, marketer, or someone who enjoys crafting personalized content. One common task involves how to clip last 1 minute with windows, especially on a Windows system. Fortunately, Windows provides robust tools that make this process seamless. In this comprehensive guide, we’ll walk you through multiple methods to help you clip the last minute of any video.
Why Clip the Last Minute of a Video?
Before we delve into the techniques, let’s briefly touch upon the reasons for trimming the last part of a video how to clip last 1 minute with windows:
- Highlight Key Moments: Often, the most critical segments are at the end of a video, making it ideal for creating trailers, summaries, or impactful conclusions.
- Remove Unnecessary Content: End sections may include credits, outtakes, or redundant footage that detracts from the main content.
- Create Shareable Snippets: Shortened video clips are perfect for sharing on social media platforms like Instagram, Twitter, and TikTok.
Top Methods to Clip the Last Minute of a Video on Windows
1. Using Windows Photos App
Windows 10 and 11 come with the built-in Photos app, which includes a video editor feature. Here’s how to use it:
- Open the Video in Photos:
- Locate your video file in File Explorer, right-click, and select Open with > Photos.
- Access the Editing Tools:
- Click the three-dot menu in the top right corner and select Edit & Create > Trim.
- Set the Trimming Range:
- Drag the sliders to set the starting point 1 minute before the video’s end. The endpoint should align with the video’s finish.
- Save the Edited Video:
- Click Save as and choose a location to save the clipped file.
Pros:
- Free and pre-installed on Windows.
- Simple interface for beginners.
Cons:
- Limited advanced editing features.
2. Using VLC Media Player
VLC is a popular, free multimedia player that doubles as a versatile video editor. Follow these steps to clip the last minute of a video:
- Download and Install VLC:
- If you don’t already have VLC, download it from the official VLC website.
- Play the Video:
- Open VLC and load your video.
- Use the Record Feature:
- Navigate to the point where the last minute of the video begins.
- Go to View > Advanced Controls to enable the recording toolbar.
- Click the Record button (red circle) and play the video until the end. Stop recording when it finishes.
- Locate the Clipped File:
- The recorded clip will be saved in your Videos folder by default.
Pros:
- Supports various video formats.
- Free and lightweight.
Cons:
- Slightly less intuitive interface for beginners.
3. Using Windows Video Editor (Built-in)
Windows Video Editor, part of the Photos app suite, is another built-in tool for trimming videos.
- Launch Video Editor:
- Search for Video Editor in the Windows Start menu and open it.
- Create a New Project:
- Click New Video Project and import your video file.
- Trim the Video:
- Drag the video to the timeline, select it, and click Trim. Adjust the sliders to the last 1-minute segment of the video.
- Export the Video:
- Click Finish Video to save the trimmed file.
Pros:
- Fully integrated with Windows.
- Easy to use for basic edits.
Cons:
- Limited to basic editing functions.
4. Using Third-Party Software (e.g., Adobe Premiere Pro)
For professional-grade editing, third-party tools like Adobe Premiere Pro offer unmatched flexibility and precision.
- Import the Video:
- Open Adobe Premiere Pro, create a new project, and import your video file.
- Add to Timeline:
- Drag the video into the timeline and navigate to the last minute using the playhead.
- Trim the Clip:
- Use the razor tool or trim handles to isolate the last 1-minute segment.
- Export the Clip:
- Go to File > Export > Media, set the desired export settings, and save your clip.
Pros:
- Advanced editing tools and effects.
- Suitable for professional projects.
Cons:
- Expensive subscription model.
- Steeper learning curve.
5. Online Tools for Quick Edits
If you prefer not to install any software, online video editors like Clideo or Kapwing are excellent alternatives.
- Upload Your Video:
- Visit the website and upload your video file.
- Trim the Video:
- Set the trimming range to the last 1 minute of the video.
- Download the Clip:
- Export and download the edited file.
Pros:
- No software installation required.
- Accessible on any device.
Cons:
- Internet-dependent.
- May have file size or format restrictions.
Tips for Optimal Video Clipping
- Choose the Right Format: Ensure your exported video retains high quality by selecting formats like MP4 or MOV.
- Backup the Original File: Always save a copy of the original video in case of accidental edits.
- Maintain Aspect Ratio: Check that the final clip retains the same resolution and aspect ratio as the original.
- Preview Before Saving: Watch the trimmed segment to confirm accuracy before finalizing.
Conclusion
Clipping the last minute of a video on Windows is a straightforward task, whether you use built-in tools like the Photos app, advanced software like Adobe Premiere Pro, or online editors. Each method has its unique benefits, catering to both beginners and professionals. Select the option that best aligns with your requirements and skill level.

